More from the
Princess Room. This sweet little lamp, was inspired by one that I saw at Hobby Lobby.
To start things out I found this lamp. Before I worked on the lamp shade I primed and painted the lamp. I used my favorite primer Zinsser. I happened to have on hand the Rust-Oleum in gloss finish. I can't forget to mention the spray handle (I don't know what the formal name is for it). This was a great purchase. It attaches to the spray nozzle and helps my spray paint jobs have no drips and even coverage. Plus my finger doesn't hurt and get covered with paint like it used to before I found this!
I then started work on the lamp shade. I try to keep cost down on my projects and one of the latest things I have been doing is purchasing $5 twin flat sheets from Walmart to use instead of paying the high price for fabric in the fabric stores. I can't always get the color I need as in this case so I had to break down and purchase it at my local fabric store. Of course I used a 50% off coupon.
I then went to my well used cutting mat (excuse the scraps of burlap on it, you'll see why when I show all of the things I have been working on for a wedding. NOT MINE!) and my rotary cutter. I cut lengthwise 4" strips of fabric.
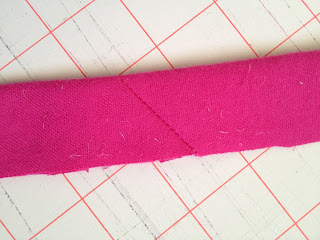
Just a little tip, when joining fabric to not make it so bulky. Cut the fabric at an angle.
Then lay the fabric with ends overlapping. Overlap the fabric the width you will be using for a seam allowance.
I used white thread so you could see the seam.
Next, open up the seam with your iron.
Clip the overlapping ends off.
Then, fold the fabric in half and iron.
I gathered the fabric.
Okay, my next step was to attach the first row of fabric to the bottom edge of the shade. I used my trusty old glue gun.
I must confess, these are not the actual pictures I took of making the lampshade. I forgot to take pictures of the process. So in these images the lampshade is much smaller than the one I used but the process is still the same.
As I came back around the lampshade I overlapped the fabric and hot glued it in place. Then to start the next row of fabric making sure to overlap the fabric to hide the sewn edge. I used my handy dandy measuring tool and made little marks with a pencil. I used those marks as a guide to get a straight row all around the shade. Notice I tried my hardest to avoid showing my horrible non-manicured nails!
On the last row along the top of the shade I hot glued bias tape along the top to hide the unfinished edge of the gathered fabric. Then I took some black fabric and gathered it just like I did the pink fabric and made two flowers from them and glued them on top of the pink ruffle. Then I added a little bling to the center of the flowers. Can you tell that when I took these pictures I wasn't planning on posting them in a blog????
I wanted to also post how I made the lampshade for the Rose Lamp but apparently I need to retake some after pictures because they were even worse than these pictures!
It's a learning process!
Check back in to see more,
Mel


